Craft Supply Organization That Keeps Projects Easy to Start
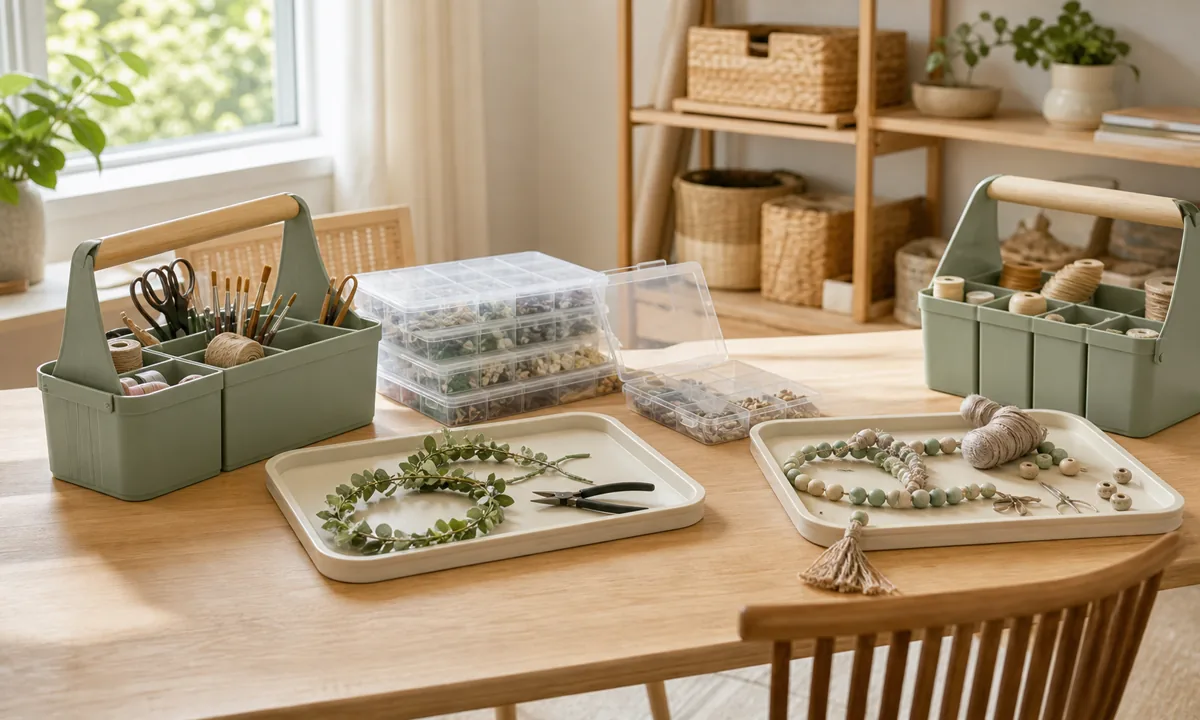
Table of Contents
- What Is Craft Supply Organization?
- Before You Buy an Organizer
- A Step-by-Step System That Holds Up
- 1. Group by activity
- 2. Create a shared basics caddy
- 3. Contain active work
- 4. Store small pieces visibly
- 5. Control messy materials
- 6. Limit inspiration stock
- Choose Storage by Behavior, Not Appearance
- Build a Reset Routine You Will Actually Do
- Common Mistakes to Avoid
- Connect This System to the Rest of Your Home
- Frequently Asked Questions
- The Bottom Line
What is the best way to organize craft supplies for adults and children? Group supplies by the activity they support, keep one contained tray for each active project, and store messy, sharp, or adult-supervised materials separately. Use broad visible categories so setup and cleanup take minutes rather than becoming a second project.
Craft rooms become difficult when materials are organized by package size instead of by the projects people actually sit down to make. Good organization is a small piece of household infrastructure, not a decorating project that has to be protected from real life.
This guide builds a practical system around craft supply organization ideas without asking you to buy a matching set of bins or turn the room into a showroom. The aim is a calm, usable setup with clear limits, safe placement, and a reset routine that survives ordinary life.
What Is Craft Supply Organization?
Craft-supply organization is an activity-based system that separates shared basics, specialty materials, active work, and safety-controlled tools. In practice, it means deciding what belongs in the category, placing it near the point of use, and giving it a visible physical limit. A useful system also makes exceptions obvious: rarely used, seasonal, fragile, confidential, or hazardous items should not be stored exactly like everyday supplies.
The best measure of success is how quickly someone can begin and pause a project without clearing an entire table. That distinction matters because most clutter is not caused by a lack of effort. It grows when the home asks someone to make the same small decision again and again.
Before You Buy an Organizer
Start with a no-shopping audit. Discard dried, empty, or unusable materials according to their labels. Separate adult tools and chemicals from child-accessible basics. List the five activities the household actually does.
Measure the usable interior for craft supply organization—not merely the outside of the cabinet or closet—and note doors, hinges, pipes, outlets, vents, and walking clearance. Take one photo before moving anything. It becomes a useful reference when you decide whether the finished system is genuinely clearer or simply rearranged.
A Step-by-Step System That Holds Up
1. Group by activity
Build zones for drawing, painting, paper craft, sewing, or model work. Project logic makes setup intuitive. Do this with the items already in the space before shopping for a container. That sequence exposes the true volume, prevents optimistic measuring, and makes the final setup easier to maintain.
For group by activity, set one visible boundary that suits craft supply organization: a shelf edge, drawer divider, basket, or labeled zone. If that boundary fills, edit the category instead of letting it spread into the next area.
2. Create a shared basics caddy
Collect safe frequently used scissors, pencils, rulers, and adhesive. One portable kit prevents duplicate hunting. Do this with the items already in the space before shopping for a container. That sequence exposes the true volume, prevents optimistic measuring, and makes the final setup easier to maintain.
For create a shared basics caddy, set one visible boundary that suits craft supply organization: a shelf edge, drawer divider, basket, or labeled zone. If that boundary fills, edit the category instead of letting it spread into the next area.
3. Contain active work
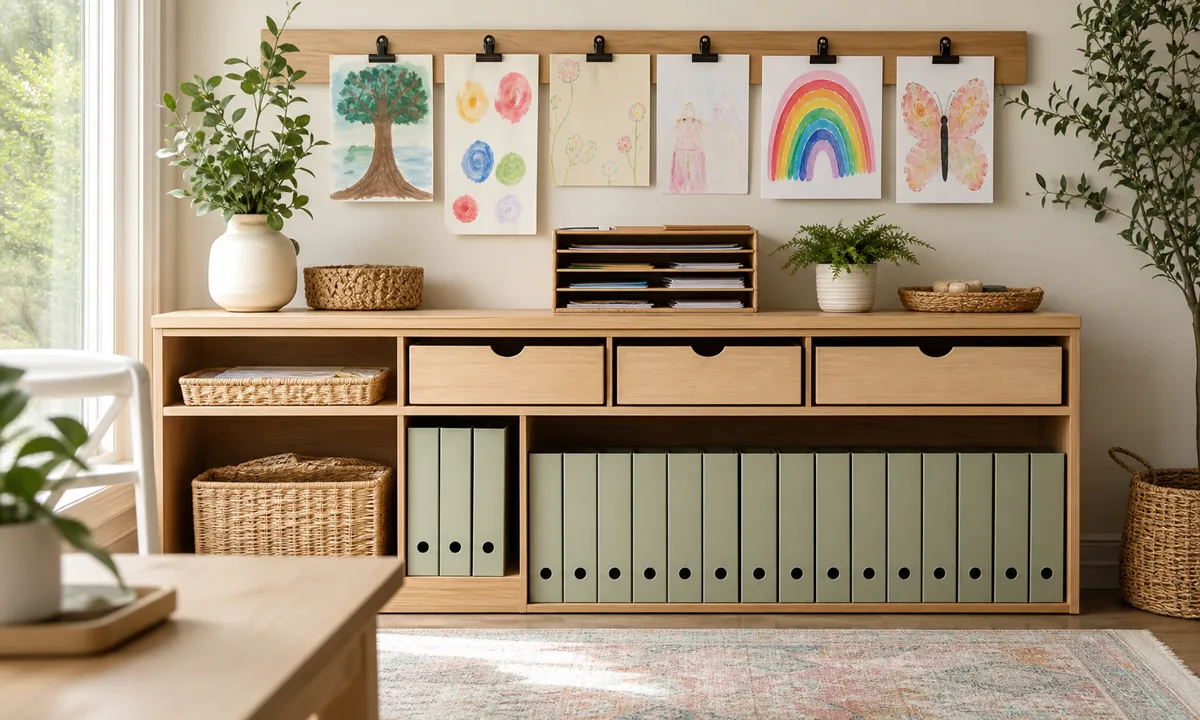
Give each current project a shallow tray or document box. Pausing does not mean mixing parts back into inventory. Do this with the items already in the space before shopping for a container. That sequence exposes the true volume, prevents optimistic measuring, and makes the final setup easier to maintain.
For contain active work, set one visible boundary that suits craft supply organization: a shelf edge, drawer divider, basket, or labeled zone. If that boundary fills, edit the category instead of letting it spread into the next area.
4. Store small pieces visibly
Use divided clear boxes for beads, fasteners, and findings. Small parts need both containment and scanability. Do this with the items already in the space before shopping for a container. That sequence exposes the true volume, prevents optimistic measuring, and makes the final setup easier to maintain.
For store small pieces visibly, set one visible boundary that suits craft supply organization: a shelf edge, drawer divider, basket, or labeled zone. If that boundary fills, edit the category instead of letting it spread into the next area.
5. Control messy materials
Place paints, inks, solvents, and hot tools according to labels and supervision needs. Safety determines access. Do this with the items already in the space before shopping for a container. That sequence exposes the true volume, prevents optimistic measuring, and makes the final setup easier to maintain.
For control messy materials, set one visible boundary that suits craft supply organization: a shelf edge, drawer divider, basket, or labeled zone. If that boundary fills, edit the category instead of letting it spread into the next area.
6. Limit inspiration stock
Assign a fixed shelf to blank materials and future kits. Capacity turns someday into a real decision. Do this with the items already in the space before shopping for a container. That sequence exposes the true volume, prevents optimistic measuring, and makes the final setup easier to maintain.
For limit inspiration stock, set one visible boundary that suits craft supply organization: a shelf edge, drawer divider, basket, or labeled zone. If that boundary fills, edit the category instead of letting it spread into the next area.
Choose Storage by Behavior, Not Appearance
The right container for craft supply organization depends on how often the category is used and what could damage it. This quick comparison keeps the purchase tied to a real job:
| Storage choice | Best for | Watch for |
|---|---|---|
| Portable activity caddy | shared daily basics | weight and returning tools |
| Shallow project tray | work in progress | clear owner and finish date |
| Divided clear case | tiny sorted components | overly narrow categories |
For craft supply organization, buy only after measuring the edited category. Leave a little open capacity so putting an item away does not require perfect stacking. If a lid, latch, or nested box adds an extra step every time, reserve it for long-term or protective storage rather than daily use.
Build a Reset Routine You Will Actually Do
Daily: Return shared basics and cover wet materials. The reset should take less time than searching for one misplaced item.
Weekly: Empty scraps and review active-project trays. Use this check to return strays, wipe the surface, and notice whether one category is repeatedly overflowing.
Seasonally: Test aging supplies and release abandoned kits responsibly. This is the moment to adjust capacity, donate usable extras, replace damaged protection, and update labels that no longer match the household.
Treat recurring trouble with craft supply organization as evidence, not a personal failure. If the same pile returns every week, move the storage closer, broaden an overly narrow category, or remove a lid that adds friction. A system should adapt to behavior instead of demanding constant willpower.
Common Mistakes to Avoid
Sorting only by color while ignoring the activity This usually creates a setup that looks finished but still requires too many decisions. Correct the category or location before adding another product.
Mixing current projects into bulk inventory When access is awkward, people create a more convenient unofficial drop zone. Put the most-used items between knee and shoulder height and reserve inconvenient space for low-frequency supplies.
Placing sharp, hot, or chemical supplies in child-accessible storage Labels help only when they describe categories everyone understands. Use plain language, keep categories broad enough to scan quickly, and revise a label when the contents repeatedly disagree with it.
Connect This System to the Rest of Your Home
Your craft supply organization setup becomes easier when it supports the systems around it. Start with the kids' bedroom organization system if the wider room still needs a full reset. Then use the entryway organization guide to solve the nearest related storage problem instead of forcing unrelated items into this zone. For a whole-home sequence, the room-by-room organization framework helps you choose what to tackle next.
For safety or preservation decisions involving craft supply organization, follow the item label and local rules first. Paints, cleaners, oils, batteries, and pesticides may need special handling; the EPA advises keeping original labels, following storage directions, and using local disposal programs. The EPA household hazardous waste guidance is a reliable reference for the part of this project that goes beyond visual tidiness.
Frequently Asked Questions
Frequently Asked Questions
What is the best way to organize craft supplies for adults and children?
What should I do first when organizing craft supply organization?
What type of organizer works best for craft supply organization?
How often should I reset craft supply organization?
What is the most common craft supply organization mistake?
The Bottom Line
A craft system should protect creative momentum by making both the first step and the cleanup path unmistakable. Keep the first version modest, live with it for a week, and change the part that creates friction. A slightly imperfect system that gets used is more valuable than a beautiful one that depends on everyone behaving perfectly.
Join Organized Haven
Get weekly home organization tips, DIY décor ideas, and exclusive printables delivered straight to your inbox. Join 10,000+ homeowners today!
We respect your privacy. Unsubscribe at any time.
Written by Danilo Souza
Danilo Souza is a Home Organization Expert and Interior Decor Specialist with over 8 years of experience in transforming cluttered, stressful rooms into functional, peaceful, and beautifully designed living spaces. His practical, step-by-step methodologies empower homeowners to create lasting organizational systems that fit their lifestyle and budget.