DIY Coffee Station Organization Ideas
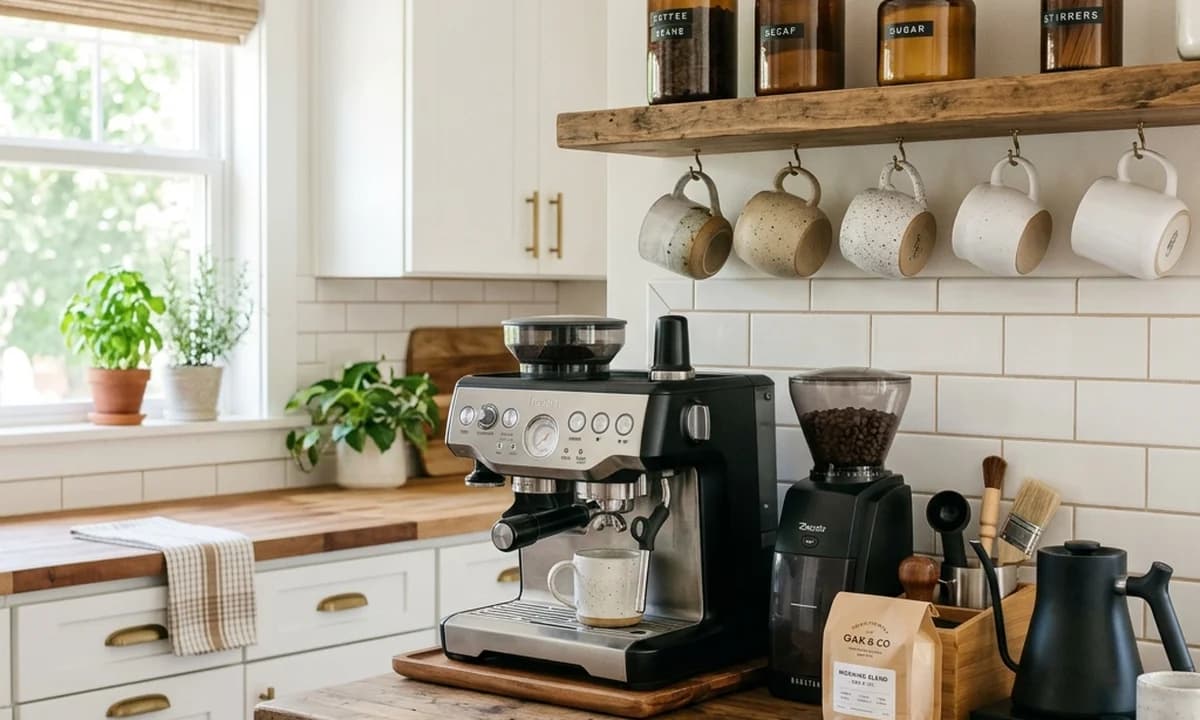
Table of Contents
What makes the difference between a coffee station that looks intentional and one that looks like counter clutter? A tray. Everything on the tray belongs to the station—everything off the tray is kitchen counter. The tray creates a visual boundary that transforms a collection of coffee equipment into a cohesive dedicated zone. Without the tray, the same items look like they were abandoned on the counter.
Coffee is the first ritual of most mornings. When the setup requires digging through three cabinets to find a filter, hunting for a spoon, and cleaning up scattered grounds from a drawer, that first few minutes of the day starts with friction.
A dedicated coffee station removes all of it. Even in a very small kitchen with limited counter space, you can carve out a functional, attractive caffeine corner that keeps everything in one place and takes 30 seconds to operate.
Step 1: Choose the Right Location
The ideal coffee station sits near two things: a water source (close to the sink) and a trash receptacle (for grounds and pods).
The dead corner: Many kitchens have an awkward corner where two countertops meet—the space is technically large but too deep to use efficiently for food prep. This is the best permanent home for a coffee maker or espresso machine. The equipment fills space that was otherwise going unused.
Freestanding cart option: If there is genuinely no counter space, a narrow rolling bar cart or microwave stand placed against a wall near an outlet becomes a completely independent coffee station. This removes the setup from the kitchen counter entirely and can fit in a dining room or breakfast nook if needed.
Step 2: Use a Tray as the Station Boundary
A wooden serving tray, a marble slab, or a metallic oval tray defines the boundary of the station. Place the coffee maker on one side. Everything else—accessories, canisters, a small plant—goes on the other side, on the tray.
This serves two practical purposes:
- Visual grouping: The tray makes the collection look like a single deliberate installation rather than scattered items
- Wipe-clean surface: Coffee grounds and drips land on the tray, not directly on the counter. Cleaning takes 10 seconds
Step 3: Move the Mugs Off the Counter and Onto the Wall
Coffee mugs are enormous storage consumers in kitchen cabinets. A collection of 8 mugs takes up most of a standard cabinet shelf. Getting them out of the cabinet and onto the wall above the station frees that space for something else and makes the mugs part of the aesthetic.
Wall rack options:
- Wooden accordion mug rack mounted to the wall
- Industrial pipe bar with S-hooks screwed to the backsplash
- Simple floating shelf with hooks attached below the shelf edge
Renter option: A freestanding countertop mug tree holds 4 to 6 mugs without any wall hardware.
Step 4: Decant Coffee Ingredients
This is the difference between a coffee station and a branded product display. Ripped cardboard boxes of tea, crinkled foil coffee bags, and branded plastic syrup bottles look like they are waiting to be put away.
Coffee beans and ground coffee: Airtight glass or ceramic canisters with one-way valves keep coffee fresh significantly longer than the original bag and look completely cohesive on the tray. One-way valves allow CO2 from fresh coffee to escape without letting oxygen in.
Sugar and sweeteners: Small glass jars with wooden lids or metal scoops. The visual is consistent with the canister set.
Flavored syrups: If you use them, pour them out of the branded plastic bottles into glass olive oil dispensers with metal pour spouts. Add a simple waterproof label. The transformation in appearance is significant.
Step 5: Contain the Small Accessories
The accessories that come with coffee-making—spoons, stirrers, pod options, filters, a coffee scoop—need a contained home rather than loose spots on the tray.
Small ceramic ramekin or glass: Holds spoons and stirrers upright, takes 2 square inches of tray space.
Pod drawer under the machine: For Keurig or Nespresso users, a slim pod drawer that slides under the coffee maker's footprint holds 30 to 50 pods without occupying any additional counter space. The pods are hidden but immediately accessible from below the machine.
Basket or small bin: For packaged tea, sugar packets, or spare pods, a small woven basket or ceramic container on the tray gives these items a home without creating visible clutter.
Frequently Asked Questions
How do you create a coffee station on a very small counter?
Where is the best place to put a home coffee station?
How do you store coffee pods without ruining the kitchen counter aesthetic?
Join Organized Haven
Get weekly home organization tips, DIY décor ideas, and exclusive printables delivered straight to your inbox. Join 10,000+ homeowners today!
We respect your privacy. Unsubscribe at any time.
Written by Danilo Souza
Danilo Souza is a Home Organization Expert and Interior Decor Specialist with over 8 years of experience in transforming cluttered, stressful rooms into functional, peaceful, and beautifully designed living spaces. His practical, step-by-step methodologies empower homeowners to create lasting organizational systems that fit their lifestyle and budget.